Start with lighting zones, not fixtures
A well-lit deck should not make the entire yard as bright as daylight. It uses several small sources to guide movement, support activities, and create a comfortable atmosphere.
Begin by mapping the important zones: patio door, stairs, path to the yard, dining table, barbecue, and lounge area. Each zone needs a different intensity and type of light.
This approach prevents a row of identical fixtures from taking over the design. It also makes it possible to separate functional and ambient lighting so you only use what the evening requires.
- Light entrances and changes in level first.
- Provide functional light near the barbecue and dining table.
- Use softer light around lounge areas.
- Keep some areas darker to preserve the view into the yard.
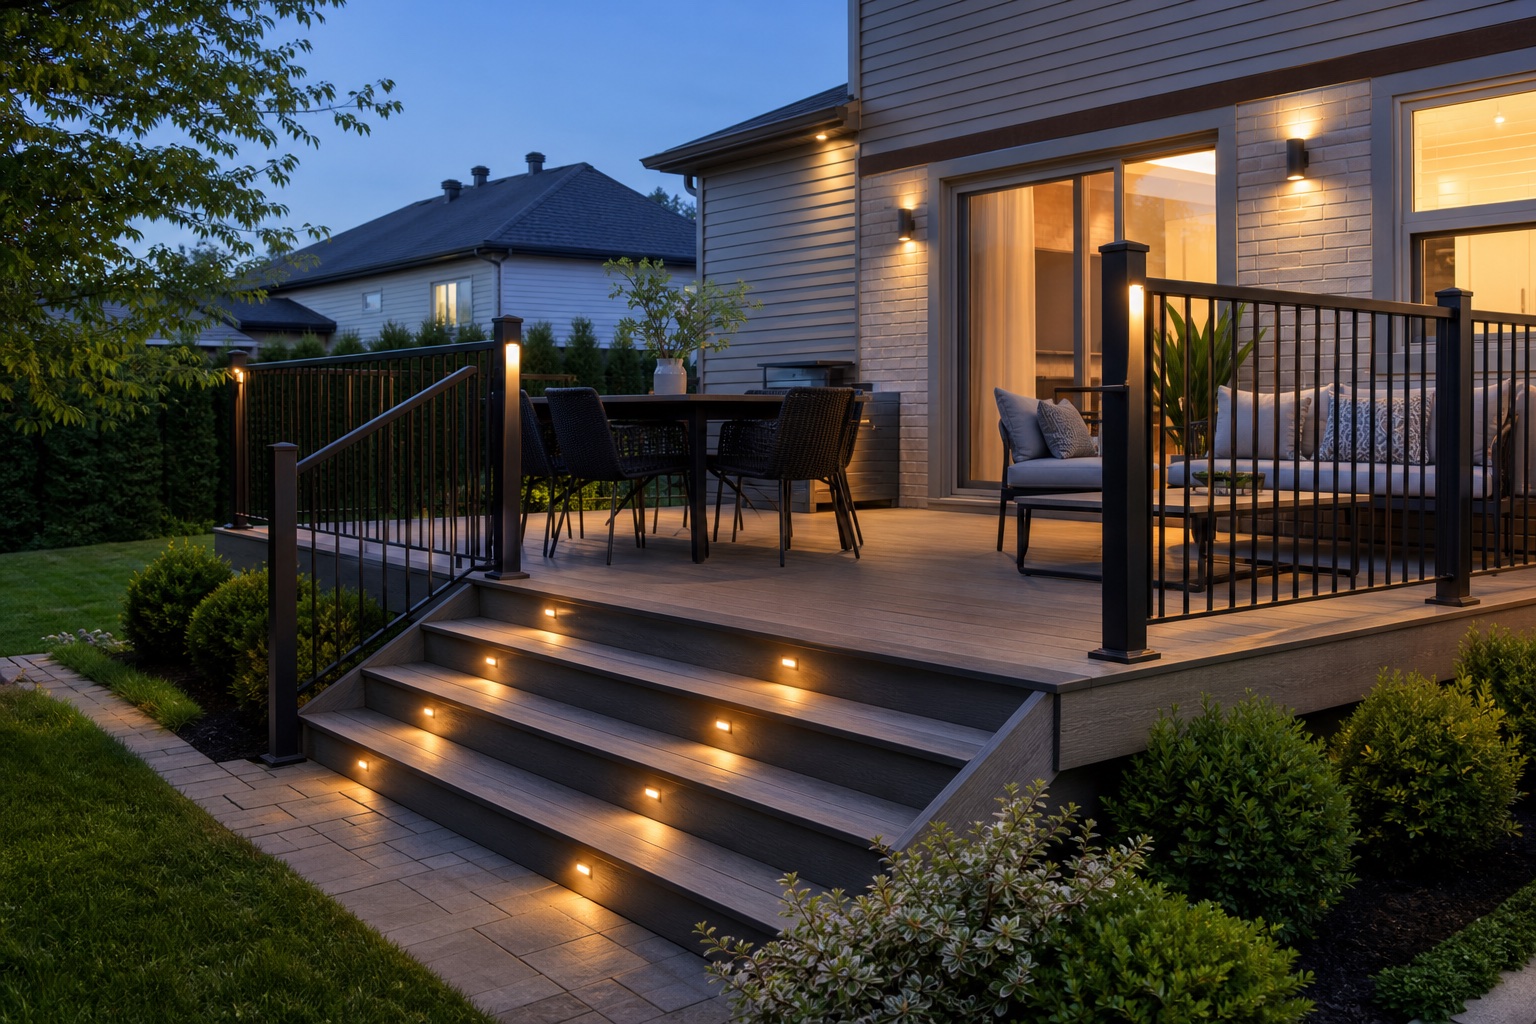
Make stairs and circulation easy to read
Stairs, landings, and transitions between the deck and yard deserve special attention. Even lighting helps people recognize each step without shining into the eyes of anyone going up or down.
Fixtures can be integrated into risers, placed below stair nosings, or mounted on nearby posts. The right choice depends on the stair construction, tread width, and locations where wiring can remain protected and accessible.
Avoid bright points directly in the line of sight. The goal is to illuminate the walking surface, not your guests’ faces. Lighting supports a safe design, but it never replaces consistent stairs, a proper handrail, or a compliant guard.
Choose a few complementary fixture types
A coordinated installation usually uses two or three fixture families instead of a different model everywhere. Step lights support circulation, wall fixtures illuminate entrances, and discreet lights in railings or posts define the perimeter.
Illuminated post caps create a more visible decorative effect. Lights below a handrail or bench produce a softer glow and hide the source more effectively. Landscape fixtures can complete the design by highlighting a tree, texture, or path into the yard.
String lights can suit some pergolas, but they should not be the only light around stairs. They also need solid attachment points and a cable route that does not interfere with doors or circulation.
- Wall lights for doors and work areas.
- Step lights for changes in level.
- Railing or post lights to define the perimeter.
- Landscape lights to visually connect the deck and yard.
Use warm, well-directed light
A warm colour temperature, often around 2700K to 3000K, works well with wood, composite decking, and residential brick. It generally feels more relaxing than very cool white light.
Brightness is only part of the result. A small shielded fixture can be more comfortable than a powerful exposed source. Aim light toward stairs, work surfaces, or the deck floor, and select fixtures that conceal the bulb or diode whenever possible.
Look at the deck from inside the house and from neighbouring properties. Downward-facing fixtures, reasonable intensity, and separate controls reduce window reflections and unnecessary light beyond the yard.
- Keep one colour temperature across zones visible together.
- Avoid unshielded fixtures at eye level.
- Test the effect from seats, the patio door, and the stairs.
Plan wiring before the deck is closed
The best time to plan deck lighting is before boards, fascia, and stair risers are installed. Open framing makes it easier to protect cables, plan penetrations, and add fixture blocking without dismantling a new finish.
Low-voltage lighting is common on decks, but the transformer, its capacity, cable lengths, and voltage drop still need to match the selected system. Connections should be suitable for outdoor use and accessible for service; they should not be permanently sealed behind fascia.
Circuits, receptacles, transformers, and electrical work must follow manufacturer instructions and applicable requirements. Bring in a qualified electrician when the project needs a new circuit, supply changes, or work beyond a straightforward plug-in low-voltage system.
- Map cable routes and the transformer location.
- Create separate zones for stairs, dining, and ambience.
- Photograph wiring before closing the framing.
- Keep replaceable connections and components accessible.
Choose products suited to Quebec seasons
Outdoor fixtures must handle rain, moisture, freezing temperatures, seasonal temperature swings, and snow removal. Confirm that each product is suitable for its exact location and that connectors, cables, and enclosures belong to a compatible system.
Consider winter maintenance. A light that projects from a stair can be struck by a shovel, while a fixture flush with a surface may collect ice or debris. Installation details should allow cleaning without pulling on cables.
Black finishes coordinate easily with aluminum railings, but coating quality and corrosion resistance matter as much as colour. Keep product references and plan how a module can be replaced if a fixture eventually fails.
Use controls to adjust the atmosphere
An astronomical timer, photocell, or smart control can turn lights on around sunset. A compatible dimmer can then lower the intensity once everyone is seated.
Separate circuits or zones offer the most flexibility. Stair lights can remain on for safety while decorative lights are dimmed or switched off. A simple control near the door is still useful even when the system is automated.
Before selecting connected controls, confirm how they work during a network outage and whether manual operation remains available. The deck should stay easy for everyone in the household to use.
Prepare a lighting plan for your estimate
For a more accurate estimate, provide deck dimensions, the number of steps, activity zones, and preferred controls. Photos taken from the house and yard help explain sightlines and locations where glare would be distracting.
Mention whether lighting will be integrated into a new build or added to an existing deck. For a retrofit, access below the structure, fascia construction, and existing conduits can change the installation method and cost.
- Identify every door, stair, landing, and path.
- Choose which zones should operate independently.
- Note the colours of decking, railings, and exterior finishes.
- Show existing receptacles and electrical equipment.
Planning a deck on the South Shore?
Send your approximate dimensions, photos, city, and preferred material. We will help you compare realistic options before construction starts.
Request an estimate